

That single rule protects sterility, preserves potency, and sets up accurate dosing math.
Before going further, here is the short checklist every researcher should run through:
- Prepare a clean workspace and swab all stoppers with a fresh alcohol swab before any needle contact.
- Add solvent slowly at an angle down the inner vial wall — never jet it straight onto the lyophilized cake.
- Swirl or roll gently to dissolve; never shake.
- Label the vial immediately with the reconstitution date, solvent volume, and resulting concentration, then refrigerate at 2–8 °C.
Key Takeaways
Proper peptide reconstitution requires bacteriostatic water for multi-dose vials, solvent added slowly down the vial wall, and a calculated reconstitution volume that puts each dose in the 5–25 unit range on a U-100 syringe.
| Point | Details |
|---|---|
| Solvent choice matters | Use bacteriostatic water (0.9% benzyl alcohol) for multi-dose vials; sterile water is single-use only. |
| Volume determines accuracy | Choose solvent volume so each dose draws 5–25 units on a U-100 syringe to minimize measurement error. |
| Dosing math formula | Concentration (mcg/mL) = total mcg ÷ mL added; units per dose = mL per dose × 100. |
| Storage ceiling is 28 days | Refrigerate at 2–8 °C and discard at 28 days or at the first sign of cloudiness or particulates. |
| CoA is non-negotiable | Only use peptides from suppliers who provide third-party-tested Certificates of Analysis with purity and MS identity. |
Table of Contents
- What supplies do you need for peptide reconstitution?
- How do you reconstitute a peptide step by step?
- How does the dosing math work for peptide reconstitution?
- How much solvent should you add, and what are common ratios?
- When do you need DMSO or a different solvent?
- How long does a reconstituted peptide stay stable?
- Which syringe and needle should you use?
- What can go wrong, and how do you fix it?
- Safety notice and when to contact a professional
- How do you choose a trustworthy peptide supplier?
- What most reconstitution guides get wrong
- Sources
What supplies do you need for peptide reconstitution?
Getting the supplies right before you start prevents the most common mistakes. Here is what you need and why each item matters.
Required items:
- Lyophilized peptide vial: the freeze-dried powder you are reconstituting.
- Bacteriostatic water (0.9% benzyl alcohol): the standard solvent for multi-dose vials; the benzyl alcohol preservative inhibits bacterial growth across repeated punctures for an extended period.
- Sterile water for injection: appropriate only for single-use preparations where the entire vial will be used in one session.
- Reconstitution syringe (3 mL typical): used to transfer solvent into the peptide vial; never reuse this syringe for dosing.
- U-100 insulin syringe (29–31 gauge): the standard dosing syringe; each unit mark equals 0.01 mL, which maps cleanly to the dosing math below.
- Alcohol swabs: for sanitizing stoppers before every needle insertion.
- Sharps container: required for safe disposal of all used needles and syringes.
- Marker and label: to record date, volume added, and concentration on the vial.
Bacteriostatic water vs. sterile water: bacteriostatic water contains 0.9% benzyl alcohol, which aligns with USP and CDC guidance for multi-dose vials and keeps the solution safe across multiple withdrawals over roughly 28 days. Sterile water carries no preservative, making it suitable only for single-use preparations where the entire vial will be used immediately. Using sterile water for a multi-dose vial is one of the most common and consequential mistakes in peptide preparation.
Terminology you need to know:
- mg / mcg: milligrams and micrograms (1 mg = 1,000 mcg).
- mL: milliliters, the volume unit for your solvent.
- U-100: the syringe scale where 100 units = 1 mL, so 1 unit = 0.01 mL.
- Concentration: expressed as mg/mL or mcg/mL, calculated from the peptide mass divided by the solvent volume added.
Pro Tip: Pick a reconstitution volume that lands your per-dose draw in the 5–25 unit range on a U-100 syringe. That window is easy to read accurately and reduces pipetting error — a dose of 2 units is nearly impossible to measure reliably, and 50+ units wastes syringe capacity.
How do you reconstitute a peptide step by step?
Done correctly, the result is a clear, particle-free solution ready for accurate dosing. The standard reconstitution SOP follows this sequence:
- Prepare your workspace. Wipe the surface with 70% isopropyl alcohol. Gather all supplies before opening anything.
- Swab both stoppers. Use a fresh alcohol swab on the peptide vial stopper and the bacteriostatic water vial stopper. Let them air-dry for 10–15 seconds.
- Draw solvent into the transfer syringe. Pull the calculated volume of bacteriostatic water into a fresh 3 mL syringe. Remove any air bubbles.
- Insert the needle at an angle. Pierce the peptide vial stopper at roughly a 45-degree angle so the needle tip points toward the inner glass wall, not the powder.
- Inject slowly down the vial wall. Push the plunger gently so the solvent runs down the glass and pools beneath the powder. This prevents mechanical disruption of the lyophilized cake and avoids foaming.
- Depressurize gently. If pressure builds, pull back slightly on the plunger to equalize before withdrawing the needle.
- Withdraw and cap the syringe. Remove the transfer syringe and set it aside — it is now single-use spent.
- Swirl or roll to dissolve. Hold the vial between your palms and roll it slowly, or swirl in small circles. Most hydrophilic peptides dissolve within 1–5 minutes. Do not shake; shaking introduces air bubbles, causes foaming, and can degrade sensitive sequences.
- Inspect for clarity. Hold the vial against a light source. The solution should be clear and colorless (or the expected color for that peptide). Any cloudiness, visible particles, or unusual color means do not proceed.
- Label and refrigerate immediately. Write the date, volume added, and concentration on the vial before it leaves your hands.
Timing matters at step 9. If the solution is not fully clear after 5 minutes of gentle rolling, give it another 10–15 minutes at room temperature before re-inspecting. Some sequences simply need more time.
Pro Tip: If the lyophilized cake seems stuck or compacted, tilt the vial at a 45-degree angle and let the solvent sit against the cake for 2–3 minutes before rolling. Longer incubation at room temperature (up to 30 minutes) is far safer than any mechanical agitation.
How does the dosing math work for peptide reconstitution?
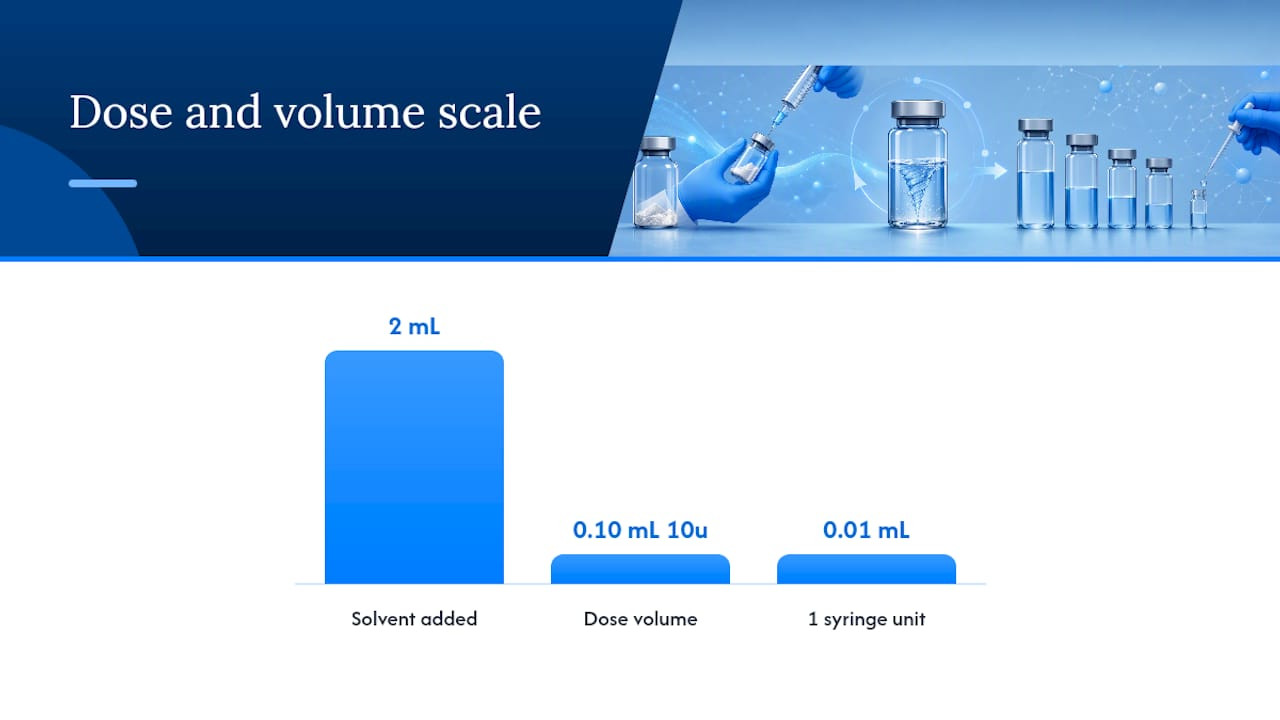
The core formula is straightforward: Concentration (mcg/mL) = peptide mass (mcg) ÷ solvent volume (mL). On a U-100 syringe, 1 unit = 0.01 mL, so units per dose = mL per dose × 100.
Here is the stepwise calculation broken down:
- Convert mg to mcg: multiply the vial’s peptide mass in mg by 1,000.
- Calculate concentration: divide total mcg by the mL of solvent added.
- Compute mL per dose: divide the desired dose in mcg by the concentration in mcg/mL.
- Convert mL to syringe units: multiply mL per dose by 100.
Worked example — 5 mg vial, 2 mL bacteriostatic water, 250 mcg target dose:
- Step 1: 5 mg × 1,000 = 5,000 mcg total peptide.
- Step 2: 5,000 mcg ÷ 2 mL = 2,500 mcg/mL concentration.
- Step 3: 250 mcg ÷ 2,500 mcg/mL = 0.10 mL per dose.
- Step 4: 0.10 mL × 100 = 10 units on a U-100 syringe.
Ten units is a clean, easy-to-read mark. That is exactly the kind of result you are aiming for when you choose your reconstitution volume. Use the Datapeptides peptide calculator to run these numbers quickly for any vial size or dose target.
Practical tips for hitting round syringe marks:
- If your target dose falls below 5 units, add less solvent to increase concentration.
- If it falls above 25 units, add more solvent to dilute.
- Round to the nearest whole unit only when the dose tolerance allows it — for research precision, stay within ±0.5 units.
How much solvent should you add, and what are common ratios?
The right volume depends on your vial size and target dose. The goal is a concentration that puts each dose draw in the 5–25 unit range on a U-100 syringe.
Common starting points by vial size:
- 1 mg vial: add 1 mL → 1 mg/mL (1,000 mcg/mL). A 100 mcg dose = 10 units.
- 2 mg vial: add 1 mL → 2 mg/mL (2,000 mcg/mL). A 250 mcg dose = 12.5 units.
- 5 mg vial: add 2 mL → 2.5 mg/mL (2,500 mcg/mL). A 250 mcg dose = 10 units.
- 10 mg vial: add 2 mL → 5 mg/mL (5,000 mcg/mL). A 500 mcg dose = 10 units.
Smaller solvent volumes produce higher concentrations, which is useful when doses are small and frequent — you draw fewer units per dose, which can actually reduce accuracy at the low end. Larger volumes spread the peptide further, making very small mcg doses easier to measure but shortening the number of doses per vial only if you are working with a fixed total mass.
When doses are in the sub-50 mcg range, a higher-concentration stock (less solvent) keeps your draw volume above 5 units. When doses are large relative to vial size, a lower concentration (more solvent) prevents you from drawing nearly the entire syringe each time.
When do you need DMSO or a different solvent?
Most peptides dissolve readily in bacteriostatic or sterile water. Hydrophobic sequences — those with many nonpolar residues — often do not, and forcing them with aqueous solvent alone causes precipitation or a permanently cloudy solution.
For these cases, the two-step protocol is the standard approach:
- Add a small volume of DMSO (typically 50–100 µL) directly to the dry peptide and allow it to dissolve fully into a concentrated stock.
- Then add aqueous solvent (bacteriostatic water or the appropriate buffer) slowly and gradually, with gentle mixing between additions.
- Never add a large aqueous volume all at once — rapid dilution causes hydrophobic peptides to crash out of solution immediately.
One important caution: peptides containing cysteine (Cys) or methionine (Met) residues are sensitive to DMSO oxidation. DMSO can oxidize these sulfur-containing side chains, altering the peptide’s structure and activity.
For downstream assays like circular dichroism (CD), DMSO is a problem even in trace amounts because of its high UV absorbance. A vapor-diffusion/evaporation method using a 60% ammonium nitrate (NH4NO3) well solution can remove DMSO from a peptide stock and allow reconstitution in an aqueous buffer such as 20 mM Tris pH 7.5 with 100 mM NaCl. The process runs up to 16 hours at 25 °C and has limitations tied to peptide stability during extended incubation.
Pro Tip: Avoid DMSO in any sample destined for CD analysis or live-cell assays unless you have a validated solvent-exchange step planned. If you discover DMSO is necessary after the fact, the NH4NO3 vapor-diffusion method is your best remediation option — but plan for it before you start, not after.
How long does a reconstituted peptide stay stable?
Refrigerate immediately at 2–8 °C and use within the window your supplier specifies. For most bacteriostatic-water-reconstituted peptides, that window is approximately 28 days.
Stability guidance: The commonly cited 28-day refrigerated window for bacteriostatic-water-reconstituted peptides reflects the preservative effectiveness of 0.9% benzyl alcohol and aligns with USP and CDC multi-dose vial guidance. Treat it as a practical ceiling, not a guarantee — peptide-specific stability data from your supplier’s Certificate of Analysis takes precedence.
Several factors shorten that window in practice. Peptide sequences with oxidation-sensitive residues (Met, Cys, Trp) degrade faster. Repeated punctures introduce contamination risk even with a preservative. Any room-temperature exposure beyond what is needed for a single draw accelerates degradation. And visible cloudiness or color change at any point means the vial is done, regardless of how many days remain.
Storage do’s and don’ts:
- Store upright in the main compartment of the refrigerator, not the door (temperature fluctuates there).
- Label every vial with the reconstitution date, solvent volume, and concentration before refrigerating.
- Keep the vial away from light; wrap in foil if the refrigerator has a light that stays on.
- Do not freeze a reconstituted solution unless the peptide-specific data explicitly supports it — freeze-thaw cycles can cause aggregation and loss of activity.
- Discard at the first sign of cloudiness, particulates, or unexpected color, and at the 28-day mark if no peptide-specific data extends it.
For peptides with special handling requirements, the Datapeptides lab standards guide covers storage, labeling, and shelf-life considerations in detail.
Which syringe and needle should you use?
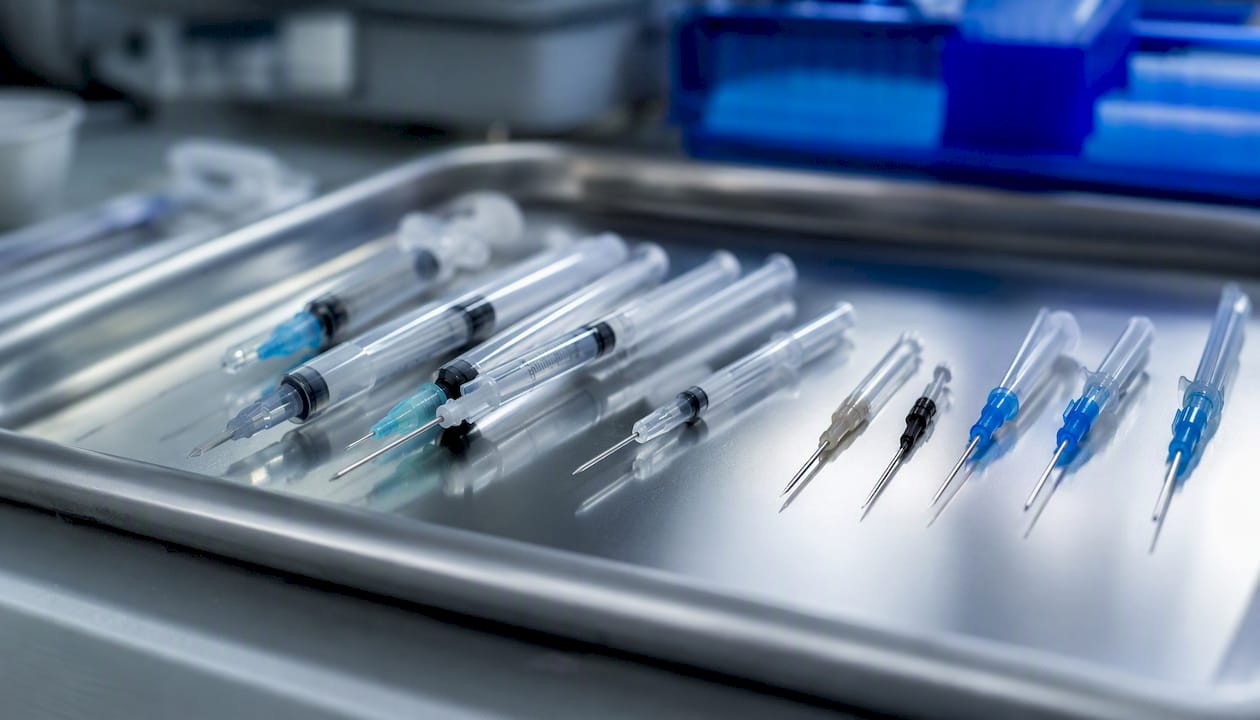
Use a fresh U-100 insulin syringe with a 29–31 gauge needle for subcutaneous peptide injections. Keep the transfer syringe — the one you used to add solvent to the vial — completely separate from your dosing syringe. Never use the same syringe for both steps.
U-100 unit-to-volume mapping:
- 1 unit = 0.01 mL
- 10 units = 0.10 mL
- 50 units = 0.50 mL
- 100 units = 1.00 mL
For very small dose volumes (under 0.10 mL), a U-50 or U-30 syringe offers finer graduations and better accuracy. U-50 syringes hold 0.5 mL total with 0.01 mL per 2 units; U-30 syringes hold 0.3 mL and are useful when doses are consistently in the 0.05–0.15 mL range.
Needle length for subcutaneous injection is typically 5/16 inch (8 mm), which is sufficient for most injection sites. A 1/2 inch (12.7 mm) needle is used when more tissue depth is needed. For gauge, 29–31 gauge needles minimize discomfort and tissue trauma. A 27–28 gauge needle draws solvent faster during reconstitution but is coarser for injection — which is why using a separate, sturdier needle for the transfer step and a finer one for injection makes practical sense.
All used needles and syringes go directly into a sharps container immediately after use. Never recap, bend, or break needles before disposal.
Pro Tip: Use a 23–25 gauge needle on your transfer syringe when drawing bacteriostatic water — it flows faster and reduces the chance of bending. Then swap to a fresh 29–31 gauge needle on your dosing syringe. Two needles, two jobs, no cross-contamination.
What can go wrong, and how do you fix it?
Cloudiness, visible particulates, unexpected color, or persistent foam after reconstitution are all stop signs. Do not inject a solution that shows any of these. Contact your supplier or discard the vial.
Common causes of reconstitution problems:
- Direct jetting onto the powder: breaks up the cake violently, causes foaming, and can denature sensitive sequences. Always aim at the vial wall.
- Shaking instead of swirling: introduces air, causes foaming, and mechanically stresses the peptide.
- Wrong solvent: using sterile water for a multi-dose vial removes the preservative barrier and creates contamination risk immediately after opening.
- Poor aseptic technique: not swabbing stoppers, reusing needles, or working on an unclean surface introduces bacteria directly into the vial.
- Hydrophobic peptide in aqueous-only solvent: the peptide simply will not dissolve, producing permanent cloudiness or visible aggregates.
- Incomplete dissolution: some sequences need more time. Wait 15–30 minutes with gentle rolling before concluding there is a problem.
Immediate corrective steps:
- If the solution is cloudy after 5 minutes, roll gently for another 15–20 minutes at room temperature and re-inspect.
- If cloudiness persists and the peptide is hydrophobic, try the two-step DMSO protocol described above.
- If you suspect bacterial contamination from a technique error, discard the vial. No amount of re-inspection makes a contaminated vial safe.
- Do not use sonication or heat to force dissolution — both can degrade peptide structure.
Quick reference for common questions:
How much water do I add? Add enough to put your per-dose draw in the 5–25 unit range on a U-100 syringe. For a 5 mg vial with 250 mcg doses, 2 mL is a reliable starting point.
Why is my solution cloudy? The most likely causes are direct jetting onto the powder, shaking, or a hydrophobic peptide sequence that needs a co-solvent. If the cloudiness appeared after refrigeration, the peptide may have aggregated — warm gently to room temperature and swirl before re-inspecting.
How do I calculate the right dose? Divide your target dose in mcg by the concentration in mcg/mL to get mL, then multiply by 100 for U-100 units. The worked example in the math section above walks through a complete calculation.
Safety notice and when to contact a professional
This guide covers laboratory and research-prepared peptide reconstitution. If you are following a prescriber’s instructions or working with pharmacy-prepared peptides, those instructions take precedence over any general protocol. Stop and seek guidance if anything is unclear.
When to contact a professional or your supplier:
- Visible contamination, unexpected color, or particulates that do not resolve after proper technique.
- Any unexpected reaction following injection — stop use and contact a licensed healthcare provider immediately.
- Uncertainty about which solvent is appropriate for a specific peptide sequence.
- Vendor-specific contraindications listed on the Certificate of Analysis or product documentation.
Regulatory best practices for multi-dose vials, including the 28-day guidance, draw from USP and CDC standards for sterile compounding and multi-dose container use. Always cross-reference your peptide supplier’s specific storage and handling instructions, as sequence-dependent peptide stability varies considerably and may require shorter use windows than the general 28-day rule.
Pro Tip: Write the supplier’s contact number, the vial’s lot number, and the CoA link directly on the vial label before you start reconstitution. If something goes wrong — a vial that will not dissolve, unexpected appearance, a suspected QC failure — you can reach support immediately without hunting for paperwork.
This content is general research guidance, not a substitute for professional medical, pharmaceutical, or laboratory advice. Confirm current protocols with a licensed provider or qualified pharmacist.
How do you choose a trustworthy peptide supplier?
The quality of your reconstituted solution depends heavily on what was in the vial before you opened it. Supplier selection is not a secondary concern.
Non-negotiable criteria:
- Certificate of Analysis (CoA) for every lot: the CoA should show purity percentage, identity confirmation by mass spectrometry (MS), lot number, and expiration date. If a supplier cannot produce this document on request, stop there.
- Third-party testing: in-house testing is not sufficient. Look for independent laboratory verification of purity and identity.
- Research-use-only labeling: clearly stated on the product and documentation.
- Documented shipping and storage practices: cold-chain or appropriate temperature-controlled shipping for sensitive peptides.
- Accessible technical support: a real contact for questions about solvent compatibility, storage, or vial replacement.
Red flags to avoid:
- Vague claims like “high purity” with no CoA to back them.
- No clear return or replacement policy for vials that fail QC.
- Missing lot numbers or expiration dates on packaging.
- No technical contact for pre- or post-purchase questions.
Datapeptides supplies lab-grade research peptides with guaranteed 99%+ purity, third-party testing, and Certificates of Analysis available for every lot. That combination of documented identity, purity confirmation, and accessible support is the standard to hold any supplier to.
Pro Tip: Keep the vendor lot number and a link to the CoA on the same label as your reconstitution date and volume. If a vial behaves unexpectedly — won’t dissolve, looks off, or produces inconsistent results — you can pull the CoA immediately and contact support with the lot number in hand. That speeds replacement and protects your research timeline.
What most reconstitution guides get wrong
The standard advice — use bacteriostatic water, swirl not shake, refrigerate — is correct as far as it goes. What most guides skip is the part that actually causes errors in practice: the math and the volume choice.
Researchers who follow the SOP perfectly but pick an arbitrary reconstitution volume end up with doses that fall between syringe marks, which means every draw involves a judgment call. That is where dosing inconsistency actually comes from. It is not technique failure; it is a planning failure that happens before the needle touches the vial.
The 28-day storage window deserves the same scrutiny. It is a practical ceiling derived from preservative effectiveness, not a stability guarantee for every peptide sequence. Oxidation-sensitive residues, repeated punctures, and even brief room-temperature exposure all shorten that window. Treating 28 days as a hard expiration date rather than a maximum is the safer operating assumption.
The DMSO question is where even experienced researchers sometimes cut corners. Adding DMSO to a hydrophobic peptide and calling it dissolved is not the same as having a stable, bioavailable solution. The two-step protocol — a small concentrated DMSO stock, followed by slow aqueous dilution — exists because rapid dilution causes immediate precipitation. Skipping the gradual dilution step produces a solution that looks fine and performs poorly.
The practical upshot: spend five minutes on the math before you add a single drop of solvent. Choose a volume that puts your doses on readable syringe marks. Then follow the SOP. In that order.
Sources
- Protocol for reconstituting peptides/peptidomimetics from DMSO to aqueous buffers for circular dichroism analyses – PMC
- Peptide Reconstitution: Complete Research Guide (2026) | Peptide Mind
- Peptide Reconstitution Guide: Bacteriostatic Water, Dosing Math…
- How to Reconstitute Peptides: Step-by-Step | Rite Aid